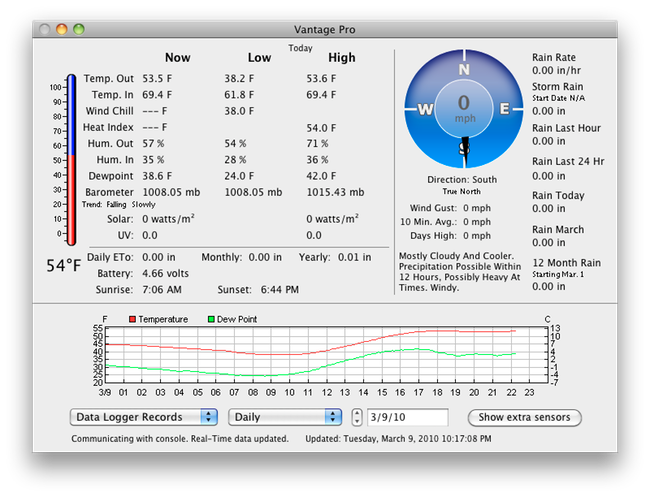
After starting a new station of type "Davis Vantage Pro" the screen type for a Vantage station will appear.
The first step in setting up a new Vantage station is the port on which you will communicate with the station. Go through the "Quick Start Guide" to get the basic communications up and running.
The rest of the Davis settings are divided into sections...
1) Station Communications
2) Station Location & Time
3) Weather Data
4) Weather Database
5) Weather Underground
6) CWOP
7) Custom Upload
Section 1 - Station Communications
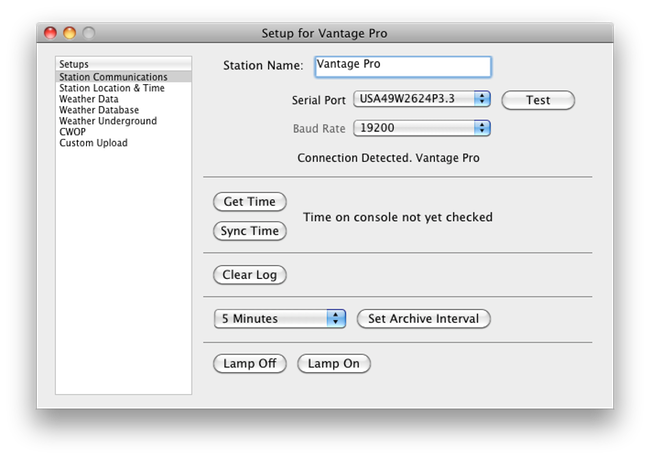
Station Name: This is the name you gave the station when it was first setup. It is not changeable.
Serial Port: This is a list of all the serial ports available on the computer. The station must be hooked up to the one selected. Click the "Test" button to see if WeatherTracker can communicate with the weather station on the serial port. If it can the message below the "Baud Rate" will say so.
Baud Rate: Set this to the same baud rate that is set on the Davis console. The default of 19200 is usually fine.
Get Time: Clicking the button will read and display the time set on the console.
Sync Time: Clicking the button will set the time on the console to match the time of your computer.
Clear Log: Clicking this button will clear the memory of the WeatherLink cable.
Set Archive Interval: Pick the interval from the drop down menu then click the button to set how often the console writes a weather record to the WeatherLink memory.
Lamp Off/Lamp On: Clicking the buttons turn the console lights on or off.
Click here for a large overview for options on connecting a Davis Vantage console to you Mac.
Section 2 - Station Location & Time
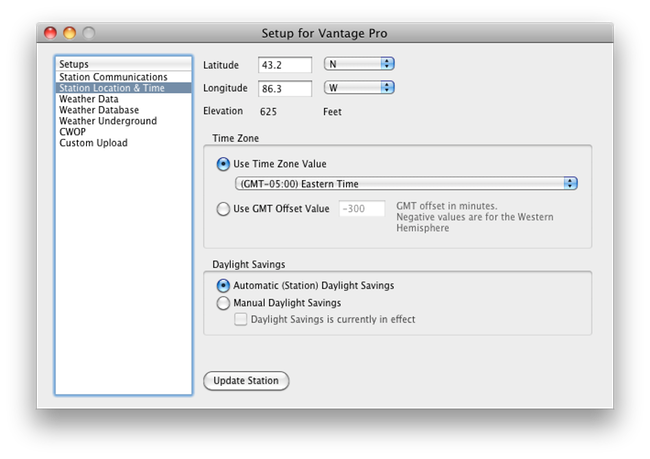
The settings on this screen come from reading the values from the console when communication first starts. Therefore they may appear inactive and unchangeable if you go to this screen before WeatherTracker has had enough time to read them from the console. If they are not available for change then close the setup window and wait a few minutes and try again.
Latitude/Longitude: Set your stations latitude and longitude here.
Elevation: Display only, this value is set directly using the console. Consult the Vantage Pro console manual for how to set the station elevation. Station elevation is used by the console to calculate sea level/atmospheric pressure.
Time Zone Section - You can choose weather to set the station to use a standard time zone or an absolute offset if one of the pre-defined values is not suitable.
Use Time Zone Value: Choose this radio button and the appropriate time zone from the drop down list. If an appropriate value is not listed then choose the GMT offset option.
Use GMT Offset Value: If the drop down list doesn't contain a suitable timezone setting then sue this option to manually set your time zone offset from GMT.
Daylight Savings Section - Use this option to control how the station adjusts for US daylight savings time.
Automatic (Station) Daylight Savings: Let the station determine if daylight savings is in effect. Note that many station with old firmware will no longer calculate daylight savings on the correct date.
Manual Daylight Savings: Us this option to manually set the station on daylight savings or off daylight savings. You would change this setting twice a year at the same time you manually set your house clocks backwards or forwards.
Update Station: Once you have made all the adjustments to the settings, click this button to update the console with your new settings.
Section 3 - Weather Data
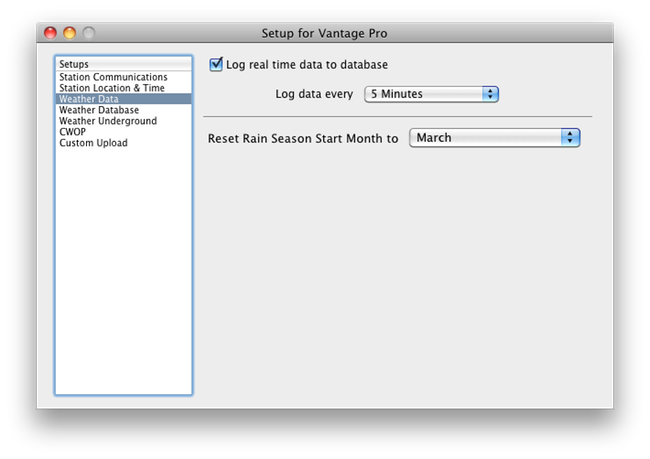
WeatherTracker will retrieve the records from the WeatherLink memory automatically and record that data to the WeatherTracker database. This data is average over the console's archive interval. But, you also have the option of recording to the database instantaneous weather data sampled at a regular interval. If you want this real-time data written to the database then check the "Log real time data to database" check box and set the interval on how often to write out a record.
Reset Rain Season Start Month to: All other stations record rain fall from the beginning of the year. The Davis Vantage station record a running value based on a month that you choose. The display calls this the "12 Month Rain" value and it is the amount of rain that has fallen since the 1st of the chosen month. Use the drop down list to reset the month to one of your choosing.
Section 4 - Weather Database
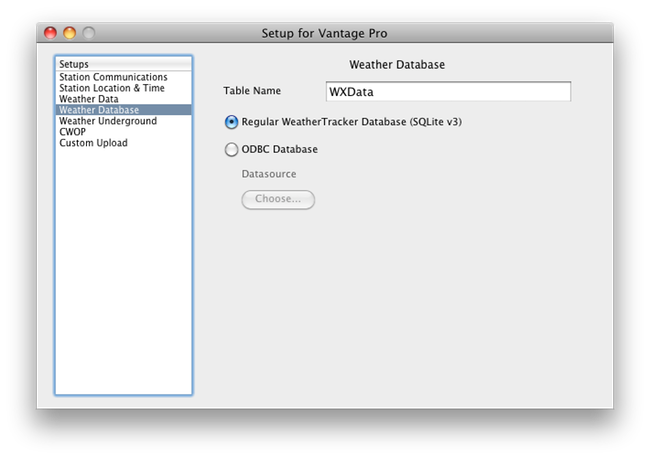
Table Name: Set the name of the table in the database. You would usually only change this if you were already recording data to a table other than the default of "WXData".
Database Options-
Regular WeatherTracker Database (SQLite v3): This is the default. The database will be stored in the folder reserved for application data as a SQLite version 3 database. This application data location varies depending on operating system, Windows or Macintosh. You can easily find the location of the database by choosing "Open Support Folder" from the "Help" menu. A window open to the support folder will open.
ODBC Database: If you want to write the data to your own database that supports and ODBC connection choose this option. The "Choose..." button will allow you to choose an ODBC datasource that you have previously defined using the proper utility for your operating system. Mac users should look into ODBC Administrators Tool. Windows users can use the default ODBC Administration tools installed with windows.
Section 5 - Weather Underground
All stations use the same setup for Weather Underground. This page explains the settings.
Section 6 - CWOP
All stations use the same setup for CWOP. This page explains the settings.
Section 7 - Custom Upload
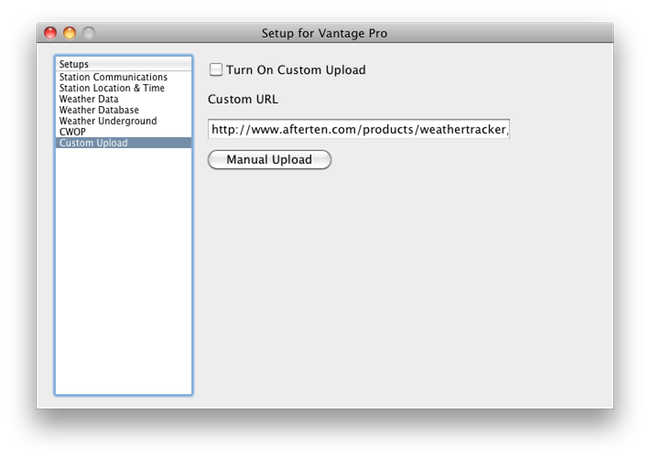
This is used for a specific application to send weather data to a web site and process that data using a PHP script. If you don't know what this is used for then you don't need to use it. It's probably going away anyways, so don't worry about it.